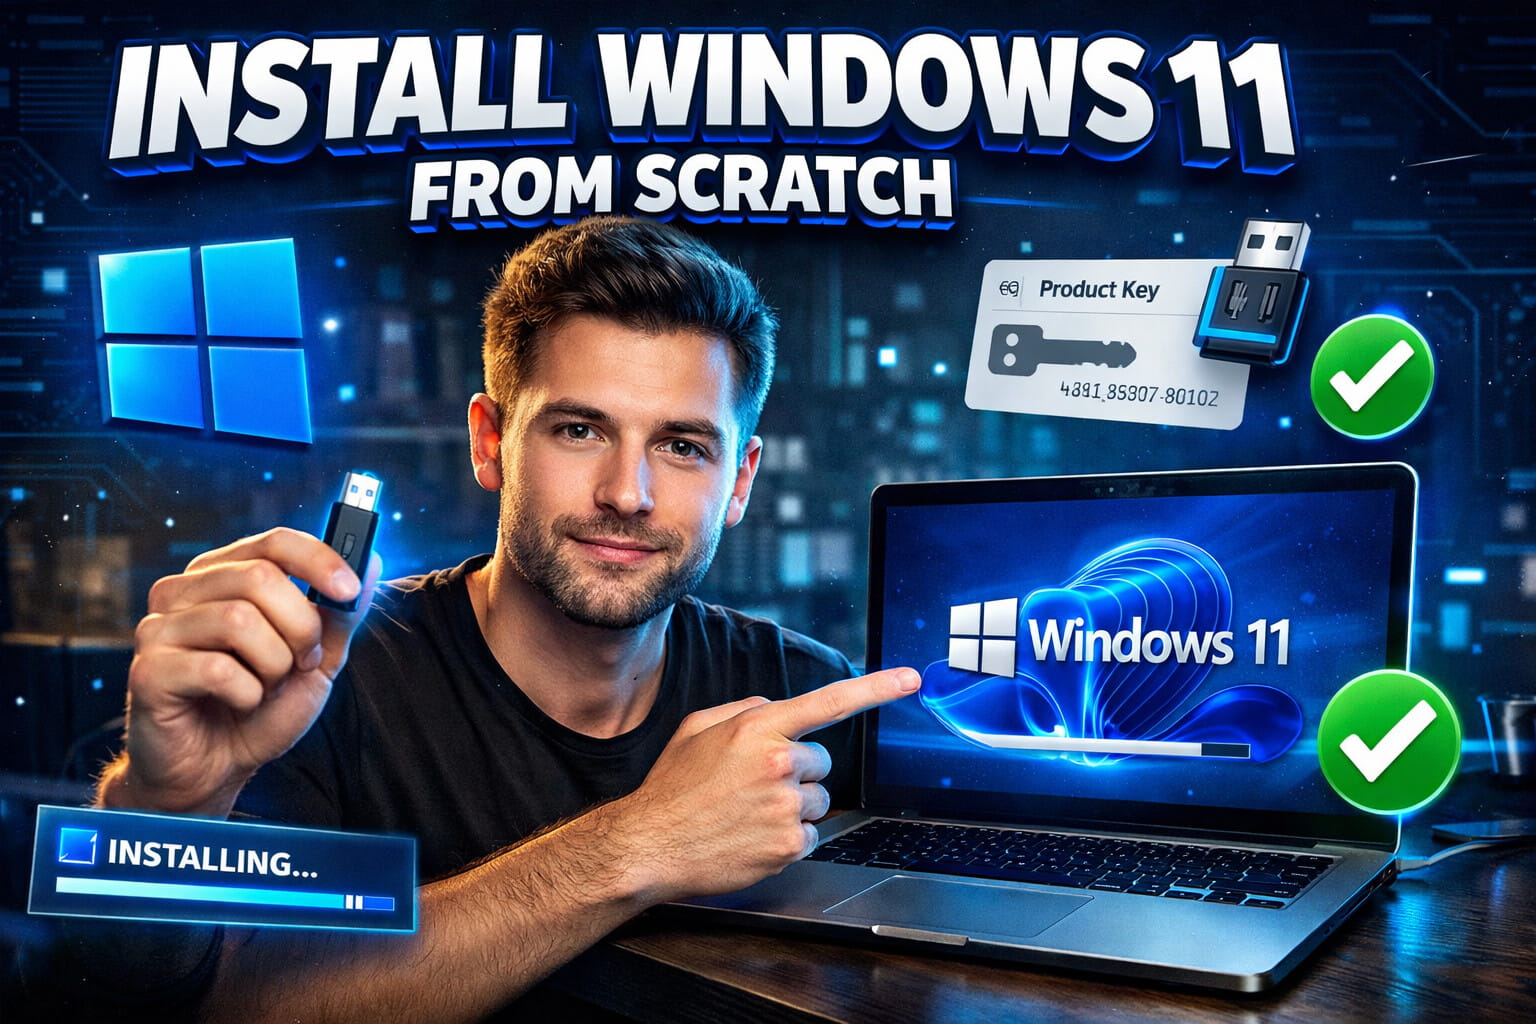
How to Install Windows 11 From Scratch: The Complete Guide for New Customers
Already have Windows 10 installed and just want to upgrade to Windows 11? You're in a much simpler situation. Check our Windows 10 to Windows 11 upgrade guide for quick instructions that take less than an hour and preserve all your files.
You've just purchased a Windows 11 product key from eKeys.io, checked your email, and found your license code waiting for you. Now you're staring at an empty PC or a computer without an operating system, wondering: "Where's the actual Windows software?" If this sounds familiar, you're exactly where thousands of our customers start, and you're about to discover that this is completely normal and actually the recommended way to install Windows.
Here's what many people don't realize when they buy a Windows license: the product key is the product. Microsoft designed their licensing system this way intentionally. You download Windows directly from Microsoft's official servers, install it on your computer, and then use your purchased product key to activate it. There's no DVD, no USB drive in the mail, and no software file to download from eKeys. This isn't a limitation but rather the safest, most up-to-date method for getting Windows on your machine.
This guide walks you through the entire process, whether you're activating Windows on a PC that already has it installed, or you're starting with a completely empty hard drive and need to build everything from scratch. We'll cover both scenarios with clear, jargon-free instructions that assume you're doing this for the first time. By the end of this article, you'll have a fully functional, properly activated Windows 11 system running on your computer.
Understanding Your Situation: Key Only, No Installation Media
The first question most customers ask after purchasing from eKeys is perfectly reasonable: "I bought Windows, but I only received a code. How do I actually install it?" The answer reveals how modern software licensing works, and once you understand this, the entire process makes much more sense. When you purchase a Windows 11 license, you're buying the legal right to use Windows, not a physical copy of the software itself. The software has always been freely available from Microsoft; what you're paying for is the activation key that unlocks it.
This system offers several significant advantages over older methods. First, you always get the absolute latest version of Windows directly from Microsoft's servers, which means all recent security patches and updates are included from day one. Second, you never have to worry about corrupted installation media, scratched DVDs, or outdated USB drives that might have been sitting in a warehouse for months. Third, this method is faster and more reliable since Microsoft's download servers are optimized for speed and automatically verify file integrity during download.
Think of it like buying a car. The key you purchased from eKeys is literally the key to unlock your Windows installation, just as a car key unlocks your vehicle. But just as you need the actual car to use that key, you need the Windows software itself. Microsoft provides that software for free through their official Media Creation Tool, and your purchased product key proves you have the legal right to use it. This separation between the license and the software itself is standard across the entire software industry, from Adobe Creative Cloud to Microsoft Office.
The confusion often comes from the fact that many people remember Windows installations from 10-15 years ago, when you actually did receive a physical DVD in a retail box. Technology and distribution methods have evolved significantly since then. Today's approach is more secure, more convenient, and ensures you're starting with the newest possible version of Windows. Your eKeys purchase simply skips the unnecessary physical distribution step and gets you directly to what matters: a valid, working license key.
What You'll Need to Get Started
Before we dive into the installation process, let's make sure you have everything you need. The requirements are straightforward, and you likely have access to most of these items already. The most important thing to understand is that if your target PC is completely empty or won't boot, you'll need temporary access to a second working computer to create the installation media. This second computer can be a friend's laptop, a family member's PC, a work computer, or even a Mac. You only need it for about 30-60 minutes to download Windows and create a bootable USB drive.
Essential Items for Installation
Your eKeys.io product key is obviously critical. You received this via email immediately after purchase, and you can always retrieve it again by checking your order status at any time. Make sure you have this key written down or easily accessible on your phone, because you'll need to enter it during the installation process. The key is a 25-character code that looks something like this: XXXXX-XXXXX-XXXXX-XXXXX-XXXXX. Keep this code secure but accessible.
You'll need a USB flash drive with at least 8GB of storage capacity. The Windows 11 installation files require approximately 5-6GB of space, so an 8GB drive works, though a 16GB or 32GB drive gives you extra room and is recommended. This USB drive will be completely erased during the process, so make absolutely sure there's nothing important on it before you begin. Any files currently on the drive will be permanently deleted when it's formatted for Windows installation.
Access to a working computer with internet is necessary for downloading the Windows installation files and creating your bootable USB drive. This computer can run Windows, macOS, or even Linux. It doesn't need to be fast or new; it just needs to have internet access and a USB port. If you're installing Windows on a brand new PC that you built yourself, you'll definitely need this second computer. If you're reinstalling Windows on an existing PC that currently boots, you can use that same PC to create the USB drive before wiping it.
Technical Requirements for Your Target PC
Your computer needs to meet Windows 11's minimum system requirements. These include a compatible 64-bit processor (1 GHz or faster with 2 or more cores), at least 4GB of RAM (though 8GB is strongly recommended for decent performance), and 64GB of available storage space. Windows 11 also requires UEFI firmware with Secure Boot capability and a TPM 2.0 chip. Most computers manufactured after 2018 meet these requirements automatically, but older machines might need BIOS updates or might not be compatible at all.
If you're unsure whether your PC meets these requirements, Microsoft provides a free PC Health Check tool on their website that scans your system and tells you if it's compatible with Windows 11. However, if you recently purchased the computer or it's relatively modern, compatibility is almost guaranteed. The stricter requirements mainly affect computers that are 5-7 years old or older.
Scenario A: I Just Need to Activate Windows (Already Installed)
If you already have Windows 11 installed on your computer but it's showing as unactivated, or if you're seeing watermarks and activation reminders, you're in the simplest situation possible. This scenario is common when you've installed Windows from a USB drive that came with a new motherboard, when you've performed a clean installation without entering a key initially, or when you've transferred Windows to new hardware. The good news is that activation takes less than five minutes and requires no advanced technical knowledge whatsoever.
Quick Activation Process
Start by clicking the Start button in the bottom-left corner of your screen, then click the gear icon to open Windows Settings. Alternatively, you can press the Windows key and the letter I simultaneously on your keyboard, which is the keyboard shortcut that opens Settings directly. Once Settings is open, navigate to the "System" section on the left sidebar, then scroll down and click on "Activation" near the bottom of the list. This Activation page shows your current Windows activation status and provides options for entering a product key.
On the Activation page, you'll see a button or link that says "Change product key" or "Update product key." Click this option, and a small window will appear asking you to enter your 25-character product key. Carefully type in the key exactly as it appears in your eKeys.io confirmation email, including the hyphens between each group of five characters. The key format is always XXXXX-XXXXX-XXXXX-XXXXX-XXXXX. Windows will automatically verify the key with Microsoft's activation servers as soon as you click Next or Activate.
The activation process typically completes within 30-60 seconds if you have an active internet connection. You'll see a confirmation message stating that Windows is now activated, and any watermarks or reminder messages will disappear immediately. If you encounter an error message, double-check that you've entered the key correctly, including all hyphens, and ensure you're connected to the internet. In rare cases, you might need to restart your computer for the activation to fully take effect, though this is uncommon with modern Windows versions.
Once activated, your Windows installation is fully licensed and legal. You won't see any more activation reminders, all features are unlocked, and you'll receive automatic updates from Microsoft just like any other properly licensed Windows installation. Your product key is now permanently tied to your computer's hardware, so you typically won't need to enter it again unless you make significant hardware changes like replacing your motherboard.
Scenario B: I Have an Empty PC (Fresh Installation Required)
This is the scenario that brings most customers to this guide: you have a computer with no operating system installed, or you want to perform a completely fresh installation wiping everything. Perhaps you built a new PC from components, or you're repurposing an old computer that currently has nothing bootable on it. Maybe you purchased your Windows 11 key from your phone or another device and now need to get the actual operating system onto your empty machine. This situation requires a few more steps than simple activation, but the process is still straightforward and well within the capabilities of a first-time installer.
The core challenge here is obvious: you can't download Windows on a computer that has no operating system. This is where the second computer becomes essential. You'll use any available computer with internet access to download Microsoft's Media Creation Tool, which will then download the full Windows 11 installation files and write them to your USB drive in a bootable format. Once your USB drive is prepared, you'll take it to your target PC, boot from it, and follow the on-screen installation wizard to get Windows running.
Understanding the Complete Process
The installation process breaks down into three distinct phases, each with its own purpose and timeline. Phase one involves using your working computer to create the bootable USB drive, which takes approximately 30-45 minutes depending on your internet speed. Phase two is the actual installation on your target PC, which takes 20-30 minutes and is mostly automated. Phase three is post-installation setup and activation, which adds another 10-15 minutes. In total, expect to spend about 60-90 minutes from start to finish, though most of this time is simply waiting for files to download and copy.
During phase one, you'll download Microsoft's official Media Creation Tool on your working computer, run it, and follow the prompts to create your bootable USB drive. The tool handles all the technical complexity automatically, downloading the latest Windows 11 installation files directly from Microsoft's servers and properly formatting your USB drive so it can boot a computer. You don't need to understand file systems, boot sectors, or partition tables; the tool manages all of this behind the scenes.
Phase two happens on your target PC. You'll plug in your newly created USB drive, restart the computer, and access the boot menu to tell your PC to start from the USB drive instead of trying to boot from the empty hard drive. The Windows installation wizard then launches automatically, walking you through language selection, partition setup, and the actual file copying process. This phase requires occasional input from you but is largely automated once started.
Phase three involves the initial Windows setup after installation completes. You'll configure basic settings like your region and keyboard layout, create or sign in with a Microsoft account, and most importantly, enter your eKeys.io product key to activate your new Windows installation. After activation, Windows will download and install the latest updates, which might take an additional 15-30 minutes depending on how many updates have been released since the installation media was created.
Creating Your Bootable Windows 11 USB Drive
Creating the bootable USB drive is the most critical preparatory step in the entire installation process. This is where you transform a regular USB flash drive into a complete Windows installation system that can boot any compatible computer and install the operating system from scratch. Microsoft provides an official tool specifically designed for this purpose, and it's remarkably user-friendly considering the complex technical operations it performs behind the scenes.
Step 1: Download the Media Creation Tool
On your working computer, open any web browser and navigate to Microsoft's official Windows 11 download page. You can find this by searching for "download Windows 11" on Google, or by going directly to microsoft.com and looking for their Windows download section. On this page, you'll see several download options; look specifically for the section titled "Create Windows 11 Installation Media" and click the "Download Now" button beneath it. This downloads a small application file (approximately 18-20MB) called MediaCreationToolW11.exe.
The download completes within seconds on most internet connections. Once finished, locate the downloaded file in your Downloads folder and double-click it to run it. Windows might display a User Account Control prompt asking if you want to allow this app to make changes to your device; click "Yes" to proceed. This is normal security behavior and is expected when running system-level utilities. The Media Creation Tool window will open, showing Microsoft's license terms.
Step 2: Configure the Media Creation Tool
Read through Microsoft's license agreement (or at least skim it) and click "Accept" to continue. The tool will spend a few seconds preparing, then present you with two options: "Upgrade this PC now" or "Create installation media for another PC." Select the second option, "Create installation media for another PC," even if you're planning to use it on the same computer you're currently using. This option gives you the flexibility to create a USB drive that works on any compatible PC.
The next screen asks you to select language, edition, and architecture. For most users, the recommended settings are perfectly fine and are automatically selected based on your current computer. However, make sure "Windows 11" is selected as the edition (not Windows 10), and that "64-bit (x64)" is selected as the architecture, since Windows 11 doesn't support 32-bit systems at all. The language should match your preference; English (United States) is most common for American customers. Click "Next" after confirming these settings.
Step 3: Create the USB Drive
Before proceeding to the next screen, plug your USB flash drive into an available USB port on your computer. Make absolutely certain that any important files on this USB drive are backed up elsewhere, because the next step will permanently erase everything on it. The tool will now ask you to choose between creating a USB flash drive or downloading an ISO file. Select "USB flash drive" and click "Next." The tool will scan for available USB drives connected to your computer and display them in a list.
Select your USB drive from the list. Be very careful here if you have multiple USB drives or external hard drives connected, because selecting the wrong drive will erase its contents. The drive should be at least 8GB in size; anything smaller won't appear in the list. After selecting the correct drive, click "Next" to begin the download and USB creation process. The tool will now download approximately 5-6GB of Windows installation files directly from Microsoft's servers and simultaneously write them to your USB drive in the correct bootable format.
When the process completes, you'll see a "Your USB flash drive is ready" message. Click "Finish" to close the Media Creation Tool. Your USB drive is now a complete Windows 11 installation system. You can safely remove it from this computer and take it to your target PC. The USB drive remains bootable and reusable; you can use it to install Windows on multiple computers if needed, though each installation requires its own valid product key for activation.
The Complete Installation Process Step-by-Step
With your bootable USB drive created, you're ready to install Windows 11 on your target computer. This phase transforms your empty PC into a fully functional Windows system. The process is largely automated once you get it started, but there are a few critical decision points where you'll need to provide input. We'll walk through each step chronologically, exactly as you'll encounter them during installation.
Step 1: Boot From the USB Drive
Insert your bootable USB drive into any USB port on your target computer and power on the machine. Immediately after pressing the power button, you need to access the boot menu or BIOS setup to tell the computer to boot from the USB drive instead of trying to boot from the hard drive. The exact key you press varies by manufacturer; common options include F12, F11, F2, F10, Del, or Esc. Most computers briefly display a message during startup telling you which key to press for "Boot Menu" or "Setup."
If you see the boot menu, use your arrow keys to select your USB drive from the list of boot devices. It might be listed by the manufacturer name (like "SanDisk" or "Kingston") or generically as "USB Storage Device" or "Removable Device." Select it and press Enter. If you entered the BIOS setup instead of the boot menu, look for a "Boot" tab or section, change the boot order to prioritize your USB drive first, save the changes (usually F10), and exit. The computer will restart and boot from the USB drive.
Step 2: Windows Setup Wizard Begins
After a few seconds of loading, you'll see the Windows setup screen with a large Windows logo. The first screen asks you to select your language, time and currency format, and keyboard layout. These default to English (United States) and US keyboard layout for American users; simply click "Next" if these are correct, or change them to your preferences before proceeding. On the next screen, you'll see a large "Install now" button in the center; click it to begin the installation process.
The setup wizard will now ask for a product key. This is where you enter your 25-character eKeys.io license key. Type it carefully, including the hyphens, or copy and paste it from your phone if you have your confirmation email open there. The format is always XXXXX-XXXXX-XXXXX-XXXXX-XXXXX. After entering the key, click "Next." Windows will verify the key with Microsoft's servers; this takes just a few seconds. If you prefer, you can click "I don't have a product key" to skip this step and enter the key after installation completes, though entering it now is more convenient.
Step 3: Choose Installation Type and Partition
After key verification, you'll see the license terms. Read through them if you wish, then check the box to accept the terms and click "Next." The next critical screen asks which type of installation you want: "Upgrade" or "Custom." Since you're installing on an empty PC or want a clean installation, select "Custom: Install Windows only (advanced)." This option gives you control over where Windows gets installed and ensures a completely fresh system.
The partition selection screen appears next, showing all drives and partitions detected in your computer. If your hard drive is completely empty, you'll see one or more entries labeled "Unallocated Space." If there are existing partitions from a previous Windows installation, you'll see them listed with their sizes. For a completely clean installation, select each existing partition and click "Delete" to remove it, which converts them all to unallocated space. Then select the unallocated space and click "Next." Windows will automatically create the necessary system partitions and begin installation.
Step 4: Let Windows Install
The actual installation now begins automatically. Windows copies files to your hard drive, installs features and updates, and configures everything needed for a working system. This process takes approximately 20-30 minutes depending on your computer's speed and the drive type (SSDs are significantly faster than traditional hard drives). Your computer will restart several times during this process, which is completely normal. Don't remove the USB drive yet, but also don't press any keys when you see "Press any key to boot from USB" after restarts; just let the computer boot normally and continue the installation.
You'll see percentage progress on screen, starting with "Copying Windows files," then "Getting files ready for installation," followed by "Installing features" and "Installing updates." Each phase completes automatically without requiring any input from you. The screen might go black for a few seconds between phases; this is normal. Just be patient and let the process complete. After the final restart, you'll see the Windows out-of-box experience (OOBE) setup screens, which means the core installation is complete.
After Installation: Activation and Updates
Once the file copying and installation phases complete, your computer restarts into the Windows out-of-box experience, which is Microsoft's term for the initial setup wizard that configures your personal preferences and settings. This wizard walks you through several screens to personalize your new Windows installation. The questions are straightforward and include things like selecting your country or region, confirming your keyboard layout, and choosing whether to connect to Wi-Fi immediately or later.
Initial Setup and Account Configuration
One of the first important screens asks you to sign in with a Microsoft account or create a new one. Windows 11 strongly encourages using a Microsoft account for setup, though some versions and installation methods allow local account creation. If you have an existing Microsoft account (such as an Outlook.com, Hotmail.com, or Live.com email address), enter those credentials here. If not, you can create a new Microsoft account for free directly through this setup screen, which takes just a couple of minutes and requires only an email address and password.
After account setup, Windows presents several privacy and preference screens. You'll be asked about location services, diagnostic data sharing, advertising preferences, and various cloud features. You can customize these to your comfort level, though the default settings are reasonable for most users. Microsoft also offers several optional services during setup, such as Microsoft 365 trial subscriptions and OneDrive cloud storage setup. These are entirely optional; feel free to skip or decline any offers that don't interest you.
Product Key Activation
If you entered your product key during the installation process, Windows should automatically activate once you connect to the internet during setup. You can verify this after setup completes by going to Settings, clicking System, and then Activation. If the activation screen shows "Windows is activated with a digital license," you're all set and don't need to do anything else. However, if you skipped entering the product key during installation, or if activation didn't occur automatically, you'll need to manually enter your key now.
To manually activate Windows, open Settings by clicking the Start button and selecting the gear icon, or by pressing Windows key plus I on your keyboard. Navigate to System in the left sidebar, then scroll down and click Activation. On the activation page, click "Change product key" and enter your 25-character eKeys.io license key exactly as it appears in your confirmation email. Click "Next" and Windows will verify and activate the key within seconds. Once activated, you'll receive confirmation and all activation reminders will disappear permanently.
Windows Updates and Drivers
After activation, your next priority should be installing all available Windows updates. The installation media you created contains the Windows version that was current when Microsoft's Media Creation Tool was last updated, which might be several months old. Microsoft releases regular updates containing security patches, bug fixes, and new features. To update Windows, open Settings, click "Windows Update" in the left sidebar, and then click "Check for updates." Windows will scan for available updates and download them automatically.
The initial update process after a fresh installation can take 15-30 minutes or even longer if many updates have been released since your installation media was created. Your computer might restart several times during this process. Keep checking for updates until Windows reports "You're up to date" with no additional updates available. This ensures your system has all the latest security patches and performance improvements. Alongside Windows updates, your computer will also automatically download and install hardware drivers for your components, ensuring everything functions correctly.
Congratulations! You now have a fully functional, properly licensed, and up-to-date Windows 11 system. Your eKeys.io product key has been successfully applied, and your installation is identical to any Windows 11 computer purchased from a major manufacturer. You can now proceed with installing your applications, transferring files, and using your computer normally. If you encounter any issues with activation or have questions about your license, our support team is available to help.
Frequently Asked Questions
I don't have access to a second computer. What are my options?
You have several alternatives if you don't own a second computer. The most straightforward option is borrowing a laptop or PC from a friend, family member, or coworker for 30-45 minutes. You only need it long enough to download and create the USB drive; nothing is installed on their computer and no personal information is accessed. Alternatively, many public libraries offer free computer access where you can create the bootable USB drive using their machines. Some computer repair shops or electronics stores also offer this service for a small fee. As a last resort, you can purchase a pre-made Windows 11 installation USB drive from Microsoft or authorized retailers, though this costs extra compared to creating your own free from the Media Creation Tool.
Can I reuse the USB drive after installing Windows?
Yes, absolutely. Once you've finished installing Windows, your USB drive remains bootable and can be used to install Windows on other computers indefinitely. You can keep it as a permanent Windows installation tool, using it whenever you need to reinstall Windows or set up additional computers. If you want to reclaim the USB drive for normal file storage, you can reformat it through Windows Disk Management or File Explorer, which erases the Windows installation files and restores it to a regular USB drive. However, many users find it valuable to keep one USB drive permanently configured as a Windows installer for emergencies and future installations.
What if I enter my product key later instead of during installation?
Entering your product key after installation instead of during the setup process is perfectly fine and works identically. Windows will run in an unactivated state with some limitations (like personalization restrictions and activation watermarks), but it's fully functional for testing and initial setup. You can activate it at any time by going to Settings, System, Activation, and entering your key. Some users prefer this approach because it lets them verify everything works correctly before committing their license key to that specific computer. The activation process takes the same amount of time regardless of when you do it, so choose whichever timing is most convenient for you.
Why doesn't eKeys.io provide Windows on a USB drive or as a download?
There are several important reasons for this industry-standard approach. First, Microsoft legally prohibits redistributing Windows installation files; only Microsoft themselves can distribute the actual Windows software. Licensed retailers like eKeys.io are authorized to sell product keys only, not the software files. Second, downloading directly from Microsoft ensures you always get the absolute latest version with all recent security patches, whereas a USB drive or download file from a retailer might be months out of date. Third, this method is actually more secure because you know the files come directly from Microsoft's verified servers rather than being handled by a third party. Fourth, it reduces environmental waste and shipping costs, making licenses more affordable. The system works well once you understand it; you're getting an official license while Microsoft handles the software distribution directly.
Is my eKeys.io product key valid forever, or does it expire?
Your product key is a perpetual license, meaning it's valid forever with no expiration date or recurring fees. Once you activate Windows with your key, it remains activated on that computer indefinitely. The only limitation is that the key is tied to the specific hardware it's activated on. If you make significant hardware changes, particularly replacing the motherboard, Windows might require reactivation. In such cases, you can usually reactivate using the same key through Microsoft's automated phone system or by contacting Microsoft support. For normal use on the same computer, your key works permanently without any renewal requirements or time limits. This is fundamentally different from subscription-based software; you own this license outright.
What happens if the installation fails or encounters errors?
Installation failures are relatively rare with modern Windows, but they can happen due to hardware incompatibility, corrupted downloads, or disk errors. If installation fails, the most common solution is to recreate your bootable USB drive using the Media Creation Tool again, which ensures you have a clean, uncorrupted copy of the installation files. Verify that your computer meets Windows 11's minimum requirements, particularly the TPM 2.0 and Secure Boot requirements. Check that your hard drive is functioning correctly and has no bad sectors. If you continue experiencing failures after trying these steps, our support team can help troubleshoot the specific error messages you're seeing and guide you through solutions. You can also find detailed error-specific help in our How-Tos and Guides section.
Can I install Windows 11 on a Mac computer?
Yes, but with important caveats. Modern Macs with Intel processors can run Windows through Boot Camp, which creates a separate Windows partition alongside macOS. Apple provides Boot Camp Assistant specifically for this purpose. However, newer Macs with Apple Silicon processors (M1, M2, M3 chips) cannot run Windows natively through Boot Camp. These Macs can only run Windows through virtualization software like Parallels Desktop or VMware Fusion, which runs Windows inside macOS rather than as a standalone operating system. If you're planning to install Windows on a Mac, verify your Mac's processor type first and follow Apple's Boot Camp instructions or virtualization software guides accordingly. Your eKeys.io product key works the same way regardless of whether you're installing on a PC or Mac.
Do I need antivirus software immediately after installation?
Windows 11 includes Windows Security (formerly Windows Defender), which is Microsoft's built-in antivirus and security suite. This protection is active immediately after installation and provides strong real-time protection against malware, viruses, and other threats. For most home users, Windows Security is completely sufficient and you don't need to purchase or install third-party antivirus software. Microsoft continuously updates Windows Security through Windows Update, ensuring you have the latest threat definitions. That said, some users prefer third-party solutions like Bitdefender, Norton, or Kaspersky for additional features. If you choose to install third-party antivirus, do so after Windows is fully updated and activated. The most important security step isn't antivirus software but rather keeping Windows updated and practicing safe browsing habits.
How do I check my order or retrieve my product key if I lost the email?
You can always access your order information and product keys through eKeys.io's order lookup system. Visit our order search page and enter the email address you used during purchase. The system will display all orders associated with that email, including your product keys. No account creation is necessary; the order lookup works directly via email verification. If you're having trouble locating your order or need assistance, contact our customer support team with your order details and they'll help you retrieve your product key immediately.
Conclusion: You're Ready to Install Windows 11 From Scratch
Installing Windows 11 from scratch might seem intimidating at first, but as you've seen throughout this guide, the process is straightforward and well within reach of any computer user willing to follow step-by-step instructions. Whether you're activating an existing Windows installation with your new product key or building a complete system from an empty hard drive, the tools and processes are designed to be as user-friendly as possible. Microsoft's Media Creation Tool handles the complex technical details automatically, leaving you with simple decisions and clearly defined steps.
The key takeaway is understanding that your eKeys.io purchase gives you a genuine Microsoft license, and downloading Windows directly from Microsoft's servers is the official, recommended approach. You're not missing anything by not receiving a physical USB drive or download link from eKeys; you're actually getting a better, more up-to-date installation method. Your product key unlocks the same complete Windows experience that any computer manufacturer provides, with the added benefit of knowing you have the absolute latest version available.
If you run into any difficulties during the installation process, remember that you're not alone. Thousands of customers successfully install Windows using eKeys.io licenses every day, and our support team has seen and solved virtually every possible installation scenario. Don't hesitate to reach out for help if you get stuck. We'd rather spend a few minutes helping you through a problem than have you struggle unnecessarily or worry that something is wrong with your purchase.
Ready to get started? Make sure you have your product key handy, gather the materials you need (USB drive and temporary computer access if necessary), and set aside about an hour for the complete process. Your new Windows 11 system is just a few steps away.
Need your Windows 11 license key? Shop our current selection of genuine Windows licenses.
Browse Windows 11 LicensesQuestions about installation or activation? Our support team is here to help.
Get Installation Support